Continued from yesterday…
Not so many pictures today – it’s too dark and dreary out to get any decent photos – but I (mostly) finished the shirt. To do the sleeves, I had to pick out the seam with my trusty seam ripper. Then I sewed the strips on flat, starting near the cuffs. (I have plans to somehow make the cuffs come down over Carolyn’s hands since the sleeves are so long. I’ll figure that bit out later.) I cut a slit in the back neck because even before I started this project I could barely stretch the collar over her head. And then I sewed strips around the top of the chest and the shoulders, all the way up to the collar. Finally, I flipped the shirt inside out and sewed up the sleeve seams again. The shirt is now mostly done.

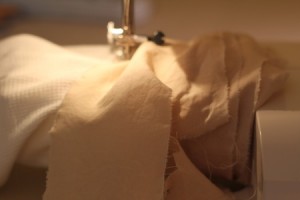
Now for the harder part. I thought I would do the pant legs the same as the sleeves, but I couldn’t get the seams open through all the many layers of stitching they must have done. Luckily, they *just* fit around the machine with the extension table bit taken off. Bonus: I didn’t have to stretch the fabric as I sewed since it was already stretched as much as it could go! However, this method only worked for the first few strips, after which there was too much material to push in between the needle and the rest of the machine. It worked out though, because by that point I was able to turn them around and work from the waistband side.
I didn’t put strips all the way up to the waistband. The shirt comes far enough that I figured I’d save some material and not cover the bits that don’t show! I have a mostly finished Mummy costume at this point. Just a few more details to work out in the next few days.
