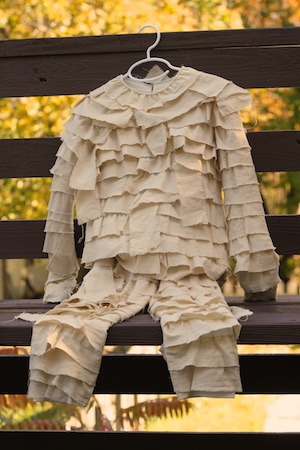
I finished up Carolyn’s Mummy costume today! (Part 1, Part 2, Part 3.)

The hardest part of this entire costume was the mask. Luckily Carolyn had today off from school for teacher conferences – I needed her to model this pretty frequently. This time, instead of only sewing strips from the bottom up, I also sewed them from the neck, over the top of the head, and back down – like you would if you were wrapping your head with bandages. This was kind of tricky and I’m not 100% thrilled with how it came out, but I think overall it’s a reasonable facsimile of a mummy mask.

Finally, I had Carolyn try on the shirt so I could figure out the end of sleeves/hands part. I cut a slit between the cuff and shirt for her thumb to stick out, then wrapped strips around the cuff and hand-stitched them down. It takes up the excess sleeve material and acts almost like gloves – hopefully I won’t have a chilly mummy for Halloween!

This costume seemed so simple on the surface, but it’s all in the details: I let bits of strips hang down while I sewed them on, and shredded the ends so there weren’t finished selvedge edges of the fabric showing.

I also took a rather big tuck in the back of the pants – the downside of buying pants a couple of sizes to big is that they have a tendency to fall off as the mummy walks!

With all the details done, it’s time for a “beauty” shot. That’s one good-looking mummy costume! Total, I spent $26. I probably could have spent a little less on one of the awful store-bought costumes we saw, but this is much, much better. Carolyn is super happy with how it turned out, too!
