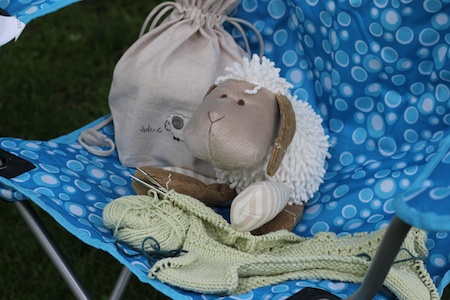
We had a World Wide Knit in Public Day event today for the shop, and knit in the park. It was so very much fun!
One of my favorite things to knit are small shawls – they hug your shoulders and provide a little extra bit of warmth, show off a beautiful single skein of yarn, and there are so many wonderful patterns you would never need to knit the same one twice! Unless, of course, you have two girls, and you stumble across a pattern called “Little House Shawl”.
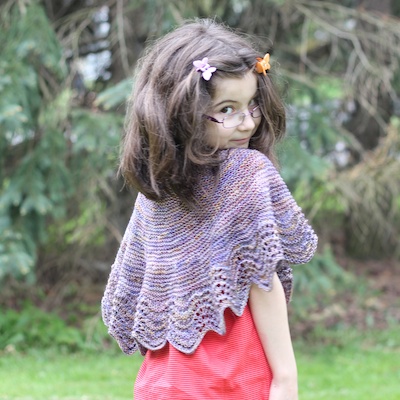
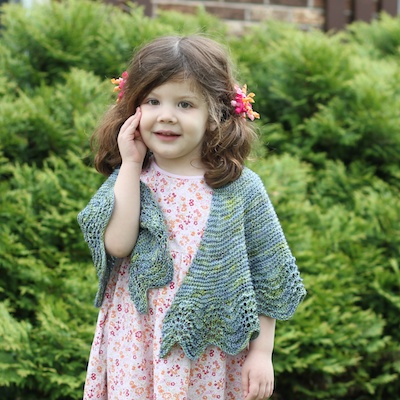
These were fun (and super easy) to knit. More details about these projects can be found here and here.
I finished up Carolyn’s Mummy costume today! (Part 1, Part 2, Part 3.)

The hardest part of this entire costume was the mask. Luckily Carolyn had today off from school for teacher conferences – I needed her to model this pretty frequently. This time, instead of only sewing strips from the bottom up, I also sewed them from the neck, over the top of the head, and back down – like you would if you were wrapping your head with bandages. This was kind of tricky and I’m not 100% thrilled with how it came out, but I think overall it’s a reasonable facsimile of a mummy mask.

Finally, I had Carolyn try on the shirt so I could figure out the end of sleeves/hands part. I cut a slit between the cuff and shirt for her thumb to stick out, then wrapped strips around the cuff and hand-stitched them down. It takes up the excess sleeve material and acts almost like gloves – hopefully I won’t have a chilly mummy for Halloween!

This costume seemed so simple on the surface, but it’s all in the details: I let bits of strips hang down while I sewed them on, and shredded the ends so there weren’t finished selvedge edges of the fabric showing.

I also took a rather big tuck in the back of the pants – the downside of buying pants a couple of sizes to big is that they have a tendency to fall off as the mummy walks!
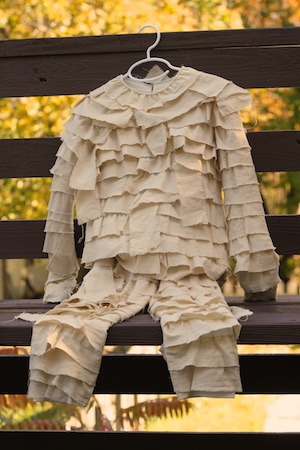
With all the details done, it’s time for a “beauty” shot. That’s one good-looking mummy costume! Total, I spent $26. I probably could have spent a little less on one of the awful store-bought costumes we saw, but this is much, much better. Carolyn is super happy with how it turned out, too!
I worked on the mummy mask today. This is turning out to be a longer project than I planned – the downside of being a bit of a perfectionist, I suppose! (Part 1, Part 2.)
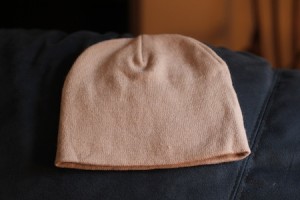
This is going to be a mummy mask when it grows up: a super cheap hat ($1) from Target! I had to go out and buy another yard of muslin and tea-dye it. (I know I don’t need a whole yard more just for the mask, but I’d rather have too much than have to go run back out to the quilt shop again. They already think I’m crazy there.)
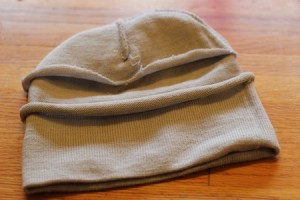
The hat was a double layer knit hat, so to make it longer I cut around the inside layer only near where they were sewn together at the crown decreases. This left a really messy edge that will roll and potentially run, but I intend to neaten that up when I’m finished.
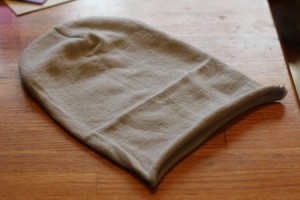
Next I cut out the area where Carolyn’s eyes and mouth will be. I purposely made those holes larger than necessary so she has good visibility and doesn’t suffocate!
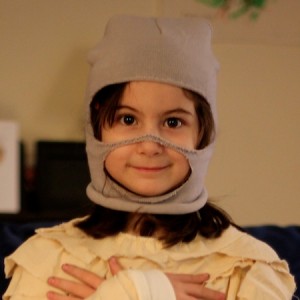
Finally I hand-stitched a thin strip across the nose piece (mostly because I was afraid it would unravel while I machine stitched it!) The rest will have to wait until tomorrow!
Continued from yesterday…
Not so many pictures today – it’s too dark and dreary out to get any decent photos – but I (mostly) finished the shirt. To do the sleeves, I had to pick out the seam with my trusty seam ripper. Then I sewed the strips on flat, starting near the cuffs. (I have plans to somehow make the cuffs come down over Carolyn’s hands since the sleeves are so long. I’ll figure that bit out later.) I cut a slit in the back neck because even before I started this project I could barely stretch the collar over her head. And then I sewed strips around the top of the chest and the shoulders, all the way up to the collar. Finally, I flipped the shirt inside out and sewed up the sleeve seams again. The shirt is now mostly done.
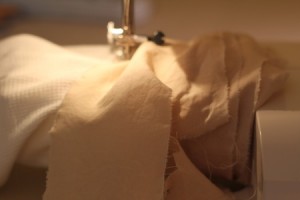
Now for the harder part. I thought I would do the pant legs the same as the sleeves, but I couldn’t get the seams open through all the many layers of stitching they must have done. Luckily, they *just* fit around the machine with the extension table bit taken off. Bonus: I didn’t have to stretch the fabric as I sewed since it was already stretched as much as it could go! However, this method only worked for the first few strips, after which there was too much material to push in between the needle and the rest of the machine. It worked out though, because by that point I was able to turn them around and work from the waistband side.
I didn’t put strips all the way up to the waistband. The shirt comes far enough that I figured I’d save some material and not cover the bits that don’t show! I have a mostly finished Mummy costume at this point. Just a few more details to work out in the next few days.
Carolyn wants to be a mummy for Halloween. However, we went looking for a mummy costume and were really disappointed in what we saw. They either looked goofy or, at one store we visited we were horrified to find an inappropriately “adult” mummy targeted towards 4-10 year old girls. Yes. A mummy with a bare midriff. Not. Happening.
DIY mummy it is, then. I drew some inspiration from this most amazing mummy costume tutorial, but I had already started by the time I found it so it’s probably not going to be nearly as awesome as that one is!
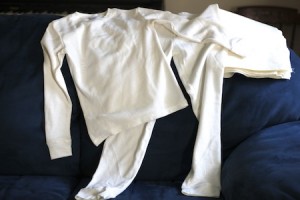
That’s a set of $10 long underwear (a size or two big to fit over street clothes) and 2 yards of muslin (really nice muslin bought at a quilt shop, so another $10 – a bit of a splurge). A sheet would have worked as well, but I don’t have any unused white sheets at the moment.
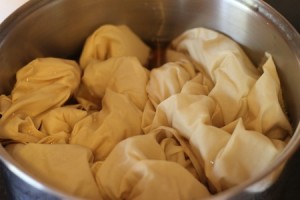
I used a dozen tea bags, some hot water, and my spaghetti pot to soak the muslin for a half hour or so. Can’t have things looking too new, obviously! Then I squeezed out the fabric, ran it under some water until it ran mostly clear, and dried it for a bit.
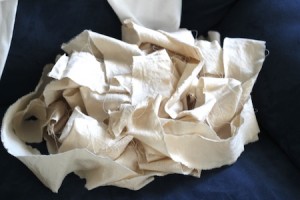
I cut little snips into the fabric all along the selvedge edge, a couple of inches apart. (I didn’t measure, just tried to make it look about bandage width.) And then the easy and very satisfying bit: riiiiiiip!
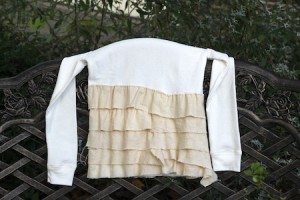
You could probably hot-glue the strips on, but I decided it would be faster to just set my sewing machine to a long-ish stitch length and stitch them on. The first strip I sewed on had to be picked off – I forgot to stretch the knit a bit so that it would have some give after the muslin was stitched on. But then I was merrily on my way. So far, so good!
As today is International Talk Like A Pirate Day, here are my “spoils of war” from the Fiber Festival:
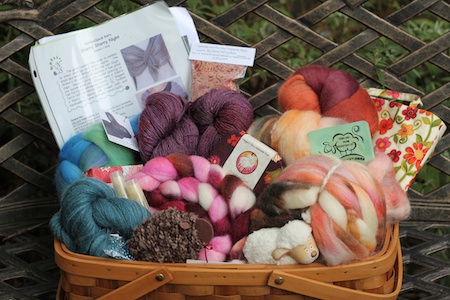
Let’s see…clockwise-ish from top left:
* Patterns from various vendors.
* A “headache pillow” made from lavender & flax seed from Cherry Hill Quilters.
* Blue/green fiber is 4 oz. of Polworth from Fuzzy Bunny.
* Two skeins of Panda Sock in “Black Cherry” from Spinning Bunny.
* Cinnamon leaf handmade soap from Maggie’s Farm.
* Orange/purple-ish fiber peeking out from the back is 4 oz. of Falkland in “Autumn Sunset” from Spinning Bunny.
* Cute little floral bag is also from Cherry Hill Quilters.
* White fiber with streaks of brown/orange/pink is 8 oz. of Blue Face Leicester/silk blend from High Bid Farm.
* Adorable little white ceramic sheep is from…I can’t remember!
* Pink/brown fiber is 4 oz. of BFL/silk blend in “Chocolate Boxes” from Fiber Fancy.
* Brown curly sheep is from Cherry Hill Quilters.
* Blue-green lace yarn is alpaca/silk laceweight (plus coordinating beads) from Ellen’s 1/2-pint Farm (a kit to make the Starry Starry Night shawl shown in front pattern.)
* Two natural lip balms, Ginger Peach and Berry Plum from Fuzzy Bunny.
* And last, but not least, Chai soap also from Fuzzy Bunny.
So many new goodies! I can’t wait to finish a few things on the needles & wheel so I can start playing with it all!
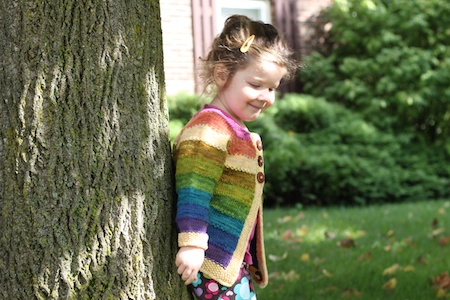
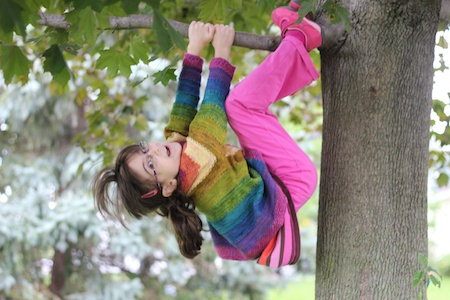
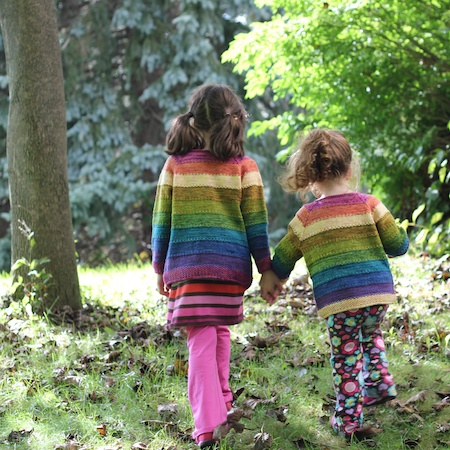
(More details can be found on their respective Ravelry pages: Tulips for Carolyn and Tulips for Anna.)